Use Nomad Provider in Traefik
Table of Contents
I run Traefik in a dedicated LXC container in my homelab to securely serve all my internal applications. Recently, I started using Nomad to run certain containerized applications and services.
To simplify the setup, I use the Nomad Provider to automatically configure my existing Traefik instance with the services I run on Nomad. Here is a short guide on how to set up the provider.
Prerequisites #
- A running Nomad cluster
- Including Docker driver
- Including ACL
- A running Traefik instance
Create a Nomad Token for Traefik #
- Create a new policy with the name
read-job.policy.hcl:
# Give read access to all jobs in the default namespace
namespace "default" {
  capabilities = ["read-job"]
}
- Apply the policy:
$ nomad acl policy apply -description "Read Job Policy" read-job read-job.policy.hcl
- Create a new token with the policy and save the secret ID:
$ nomad acl token create -name="traefik-acl-token" -policy="read-job" -type="client"
Add the Nomad Provider to Traefik #
- Add the Nomad Provider to your Traefik configuration file:
Note: This example is based on my Traefik configuration which uses Let’s Encrypt wildcard certificates.
---
certificatesResolvers:
  letsEncrypt:
    acme:
      email: YOUR_EMAIL # Change this
      storage: /var/lib/traefik/acme.json
      dnsChallenge:
        provider: cloudflare
        delayBeforeCheck: "30"
        resolvers:
          - "coraline.ns.cloudflare.com:53"
          - "kyrie.ns.cloudflare.com:53"

entryPoints:
  http:
    address: ":80"
    http:
      redirections:
        entryPoint:
          scheme: https
          to: https
  https:
    address: ":443"

api:
  dashboard: true

metrics:
  prometheus: {}

providers:
  file:
    filename: /var/lib/traefik/dynamic.yml

  nomad:
    endpoint:
      address: http://YOUR_NOMAD_SERVER:4646 # Change this to your Nomad server address
      token: YOUR_SECRET_ID # Change this to the secret ID from the previous step
- Restart Traefik
Deploy a service for Nomad to be served by Traefik #
Note: Change home.example.tld to your own domain name.
- Create a new job file
whoami.nomad.hcl:
job "whoami" {
  datacenters = ["homelab"]

  type = "service"

  group "whoami" {
    count = 1

    network {
       port "http" {
         to = 80
       }
    }

    service {
      name = "whoami"
      port = "http"
      provider = "nomad"

      tags = [
        "traefik.enable=true",
        "traefik.http.routers.whoami.rule=Host(`whoami.home.example.tld`)", # Change this to your domain
        "traefik.http.routers.whoami.entrypoints=http,https",
        "traefik.http.routers.whoami.tls.certresolver=letsEncrypt",
        "traefik.http.routers.whoami.tls.domains[0].main=home.example.tld", # Change this to your domain
        "traefik.http.routers.whoami.tls.domains[0].sans=*.home.example.tld", # Change this to your domain
      ]

      check {
        type     = "http"
        port     = "http"
        path     = "/health"
        interval = "15s"
        timeout  = "15s"
      }
    }

    task "server" {
      driver = "docker"

      resources {
        cpu    = 100
        memory = 128
      }

      env {
        WHOAMI_PORT_NUMBER = "${NOMAD_PORT_http}"
      }

      config {
        image = "traefik/whoami:v1.10"
        ports = ["http"]
      }
    }
  }
}
- Deploy the job:
$ nomad job run whoami.nomad.hcl
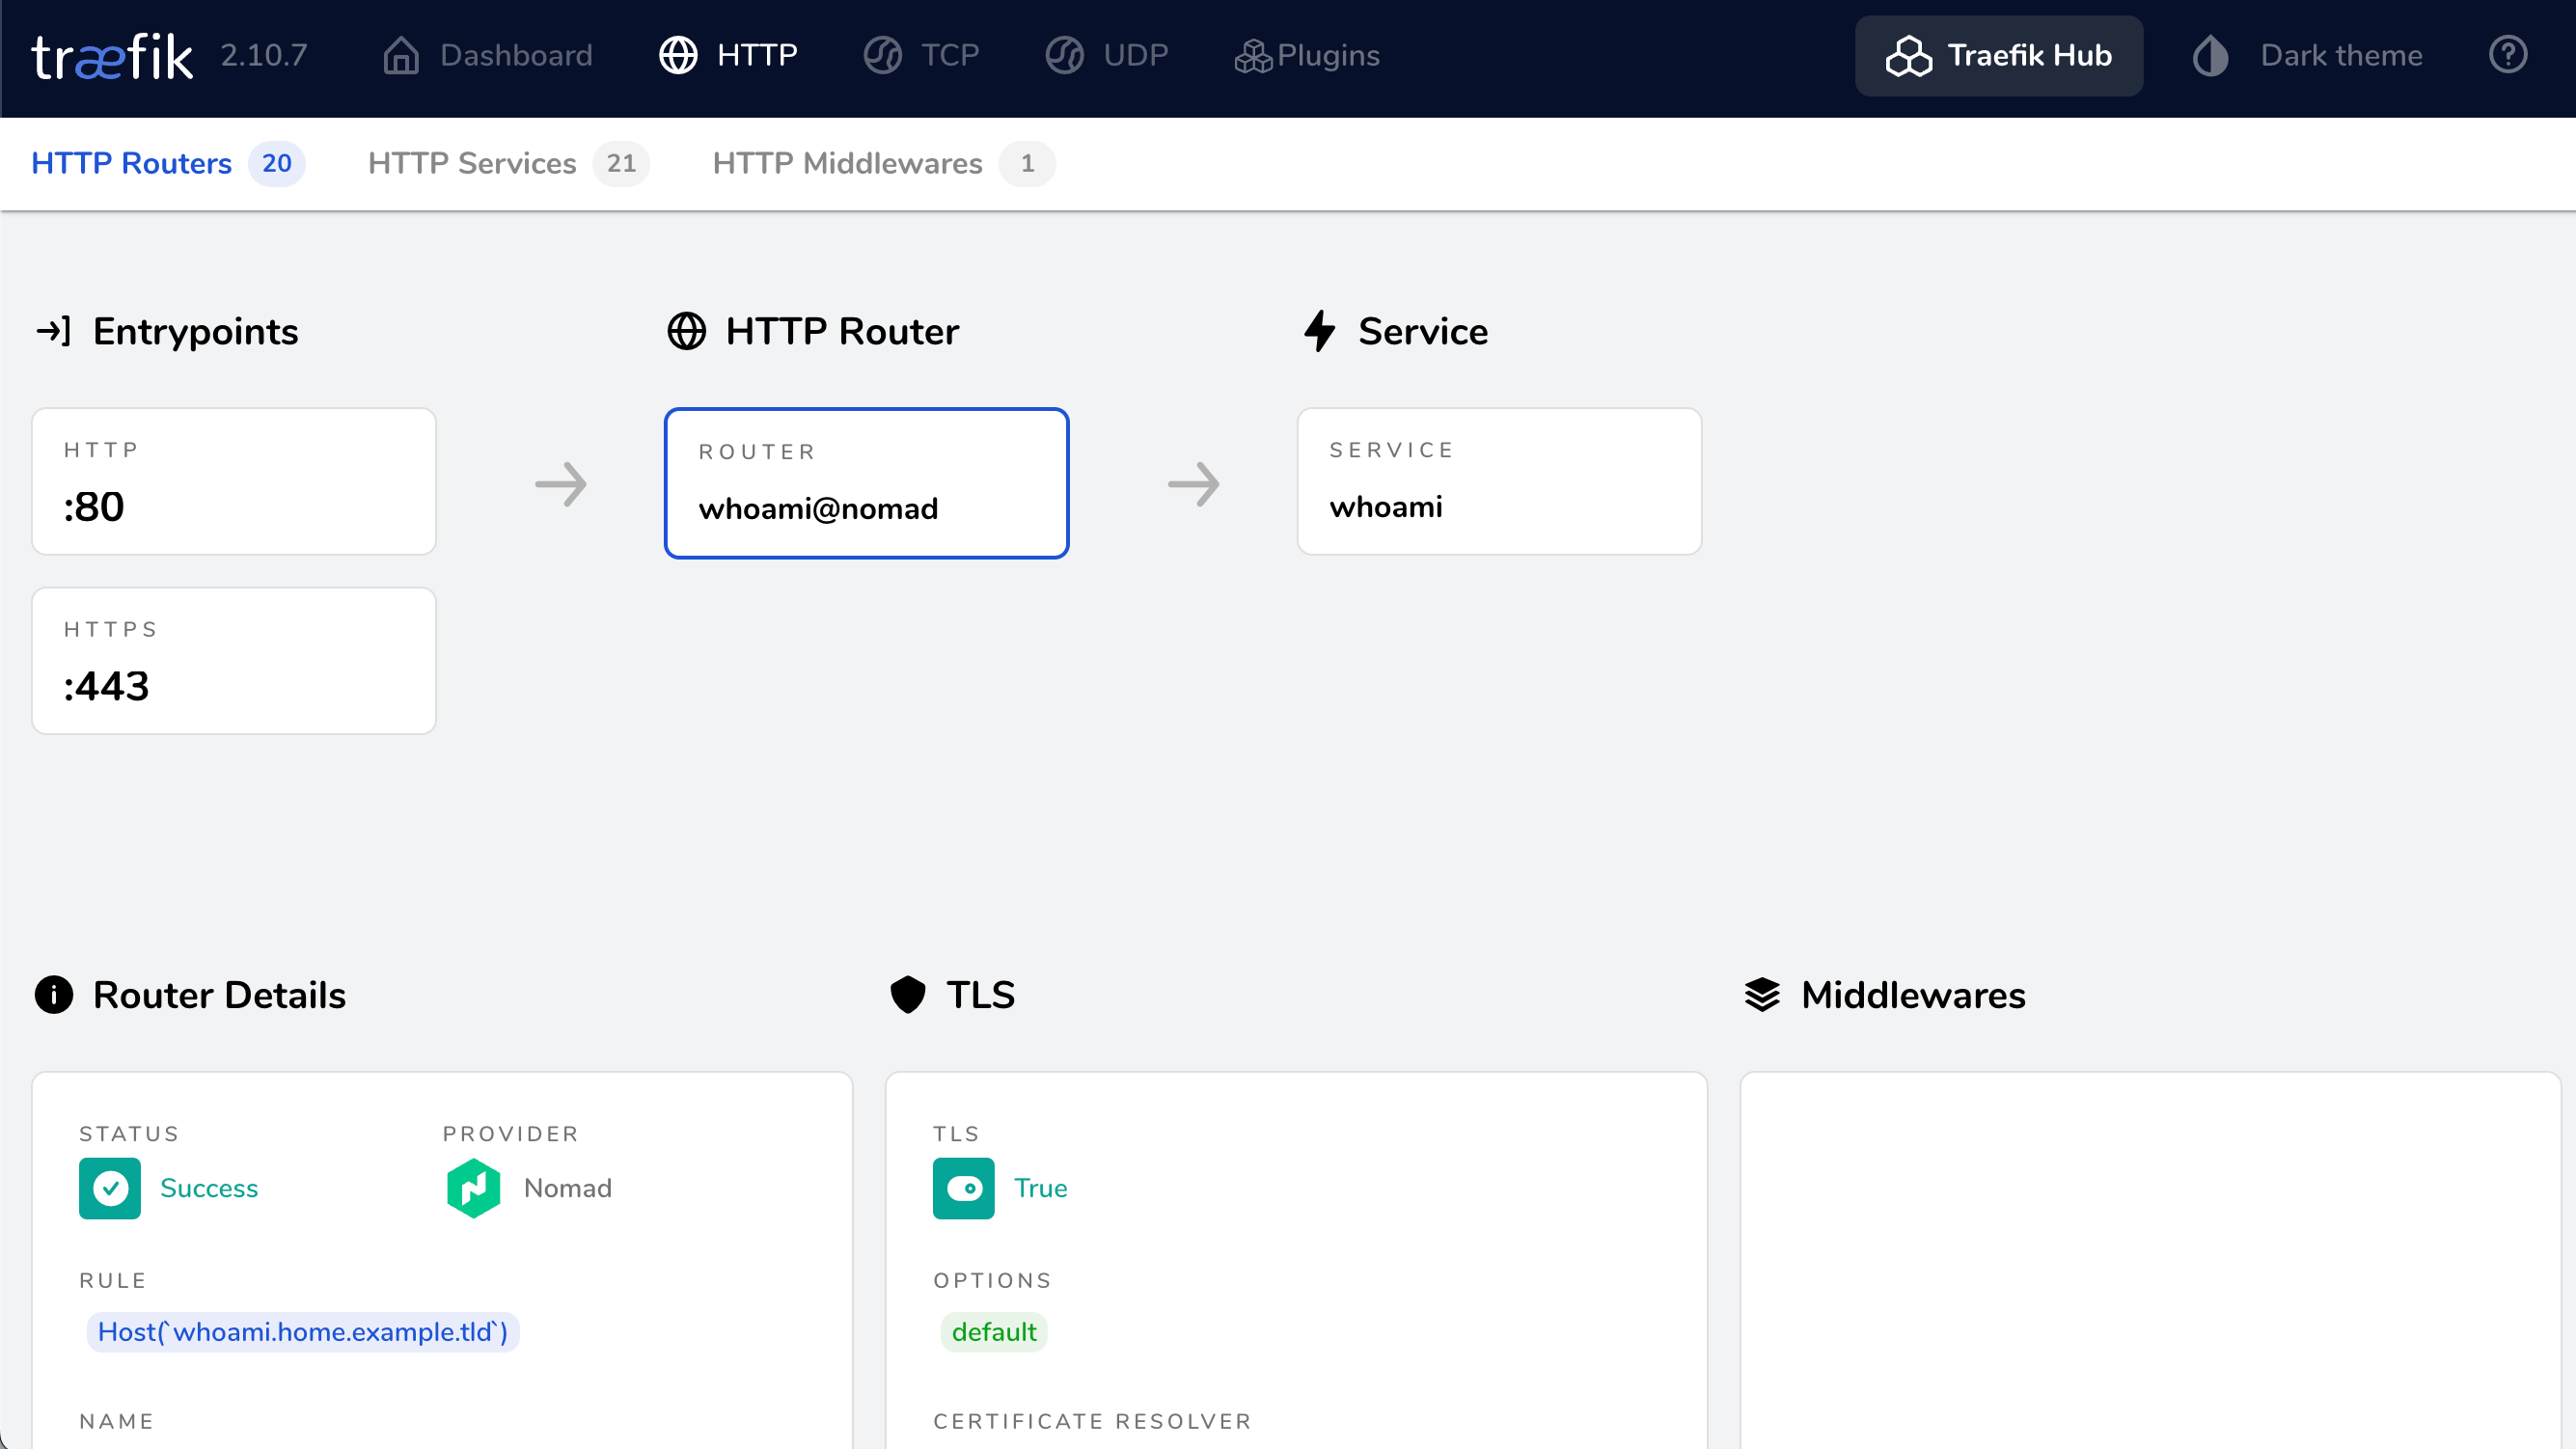
Open
https://whoami.home.example.tldin your browser and you should see the Traefik whoami service.Bonus: Check the Traefik dashboard and you should also see the whoami service provided by the Nomad Provider.